Saturday, November 30, 2013

Graphic 45 - Gift Tag

Being invited friends to the 12th birthday celebrations of their daughter, I thought it was the perfect opportunity to show the Italians what papercrafting is all about....or at least a part of what it's about.  So, I whipped up this tag...quite literally it took me about 30 minutes, but the ballerina was a leftover from a previous project so that saved me a little time.
 
 
Materials used:
 
  • Graphic 45 - French Country - Tags & Pockets;
  • Graphic 45 - French Country - Banners:
  • Graphic 45 - French Country - Flowers;
  • Graphic 45 - Nutcracker Sweet - Ballerina cut from the Snowflake Waltz paper;
  • Graphic 45 - A Place in  Time - Alpha Stickers - "Happy Birthday"  sticker;
  • Want 2 Scrap - Silver Rhinestones;
  • Tim Holtz - idea-Ology - Paper String;
  • Tim Holtz - idea-Ology - Label Letters;
  • Glossy Accents;
  • Glimmer Mist - Silver Sugar

 
Steps by Step:
  1. I selected which tag I wanted to use as my base from Graphic 45 French Country Tags & Pockets;
  2. Ballerina - maybe out of place, maybe not - Safè does ballet so I wanted to add ballet to the theme.  The Ballerina was cut from the sheet of cardstock and to give a nice 3D finished it was coated with Glossy Accents;
  3. The flower custer was made by first selecting 3 different sized, but colour co-ordinated flowers from the Graphic 45 French Country die-cut Flowers. I scrunched each of the flowers as tightly as possible to give more dimension and a bit of a grungy look.  I used double-sided tape to stick together and then sprayed with Glimmer Mist Silver Sugar to give a bit of sparkle. 
  4. The flowers were then layered along with the Banner and Sunflower. Rhinestones made the perfect centre for my flowers adding a bit of glammer and bling to the tag.
  5. To finish the bottom section, the Happy Birthday sticker was added.  Note that the sticker hangs over the edge and of course is still sticky on the exposed sections.  I cut out small pieces of matching scrap cardstock and stuck these to the back of the overhanging pieces.
  6. The Banner across the top was made by selecting 3 of the smaller banners from the Graphic 45 die-cut Banners. To assemble with the Paper String couldn't be simpler...I wanted some dimension so used American Craft This To That Foam Dots to raise the banners, but first laid the Paper String across the tag as I wanted it and adhered each Banner over the top of the String - killing 2 birds with one stone....or rather, adhering 2 items with one foam dot! :)
  7. The ballerina was also adhered using the Foam Dots to give some more dimension.
  8. The final touch was to add our names and a piece of ribbon to tie to the parcel.  Our names were made from the Tim Holtz Label Letters....I will admit that adding "Veronica" after everything else was stuck down was a bit of a challenge and I made a mistake not doing it first.  I ended up doing it twice as it was awkward trying to line up the letters only to find  after the first time it was really wonky!  But that's what makes scrapping so great...for every error you find a new technique or a unique piece of art... :)
 
Really this couldn't have been easier to make and I'm definitely going to be making more in the future.  To add a nice hand-made tag to the present was nicer for me to give than the gift itself.

As a review - I was amazed out how easy to use and how nice the finished look was using these Graphic 45 Die-Cut shapes!  Being perfectly matched colour-wise was a big advantage of course.  I've never been a big fan of using die-cut shapes.  Often I find they're not the same quality cardstock as papers or too glossy and so I have usually given them a miss...however with the Graphic 45 range this was not an issue and I will definitely be adding them to my "must have" list for all future orders. :)

I hope I've given you some inspiration...maybe use the same ideas for quick to whip up Christmas Tags?

Until next time!
Veronica

Wednesday, November 20, 2013

Dream

Today I want to share a quick card, simple design but elegant. It's always nice to receive a special handmade card, just makes the occasion that little bit more special! So if the thought of creating a handmade greeting card becomes a little daunting try using a basic card layout design, lots available. It really isn't as difficult as it might seem. Using different patterned paper or embossing folders and changing the embellishments can change the focus of a card allowing you to use the same simple sketch design over and over :)


  • First step is to cut cardstock to the size you want. Mine is cut to 6x4 1/2 (folded)
  • Then I cut a piece of coredinations pastel a little smaller and ran it through my bigshot to emboss. 
  • Using my tool I lightly rubbed and sanded to help enhance the ebossing design. Lightly swiping with ink or chalk can also help 'pop' the embossing design.
  • I then took some ribbon from my stash and adhered it across the bottom
  • Then I placed a smaller blossom in the right hand corner and used a rubon on word. Voila!
Maybe this has inspired you to get a jump start on your Christmas card list :)

Have a great day, I am off to enjoy some of this lovely sunshine while it lasts!

Thanks for stopping by!

Sue xx

Monday, September 9, 2013

Friend

What is Scrapbooking? lol don't laugh, seems a lot of people don't know, hard to believe as Scrapbooking has been a favourite past time of many for years! I get asked a lot lately what is it you actually do with your photos! Scrapbooking is preserving your personal and family photos in a book, adding memorabilia, embellishments and journalling. Some people include stories or scrap by theme, like holidays, special events, family firsts etc. It's quite simple really, it is about getting your photos out of drawers and boxes and into albums for all to see.  Now I really should start putting my pages into albums :)

I have lots of photos of my little princess and her Shetland pony but I think this one is adorable! They have a special bond and spend a lot of time just casually walking around, Shawnee grazing while my girl chats away! It's like they understand each other.

Using the gorgeous range from FabScraps, which is just beautiful with its fun designs which arrived in my latest kit from Wild About Scrap, the best online Scrapbooking store! I hope you are inspired by my layout.


Project Products Used:

FabScraps - Little Peeps - Sweet Pea
Coredinations - Pastels Cardstock
MS Punch border - Vintage Floral
Petaloo - Mixed Textured Blossoms
Petaloo - Mini Pearl Daisies
Green Tara - Blossoms
Tattered Angles Glimmer Glam - Grand Tetons
Donna Salazar Chox - Sparrow & Petals
Dusty Attic - Picket Fence
Girls Paperie - Pennant Pins
Hessian

Instructions:

1. Using Fabscraps Sweetpea cut a small strip from two sides, just enough to allow the bazill cardstock to form a border or frame. Distress all four edges and then lightly ink with Donna Salazar Mix'd Media INX Chox, I used Petals.
2. Take a 6x6 piece of Coredinations Pastel cardstock and emboss and punch one side with MS Vintage Floral, sand gently using a distressing tool. Wash with a light coat of TA Glimmer Glam, lightly ink edges and mount your photo.


3. Arrange a floral cluster with your flower blossoms and other embellishments, add some twine. I added some hessian to give some texture.
4. Paint your chipboard with a good gesso coating before inking with DS Chox. I allowed some of the gesso to show through on the fence to add an age worn look.


5. Add a small cluster of flower blossoms and embellies to top corner. I used a chipboard heart, blossoms  and vintage key charm.
6. Place chipboard letters over an old dictionary torn paper page using a little piece of hessian for more texture.
7. Complete and now ready for a frame or album :)

TIP:  I like to first lay everything out and when I am happy with the placement of everything I will start to glue it all together, taking a photo so you can refer to it also helps!

Thanks for stopping by!

Sue xx

Wednesday, September 4, 2013

Our Lucy Liu

Thank goodness for holidays as it has given me a chance to create and catch up on all my DT projects. Here is my second LO produced with the wonderful items in my DT Kit .
 
 
Products used from Wild About Scrap Online Store


Stash Items Used
 
  • sequins
  • butterflies
  • sewing machine and thread
  • black ink
  • doilies
  • chip letters
  • word stickers
 
Loved, loved, loved using the Distress Paint it is so easy to use in a bottle with a dauber applicator.  Here you can see how I used it to create the circular paint smears on the LO - such fun to 'play around' and you cant get it wrong as you can build up the colour as you wish !!
I stitched randomly over the paint to ad texture and detail - then added the little crystal coloured sequins.

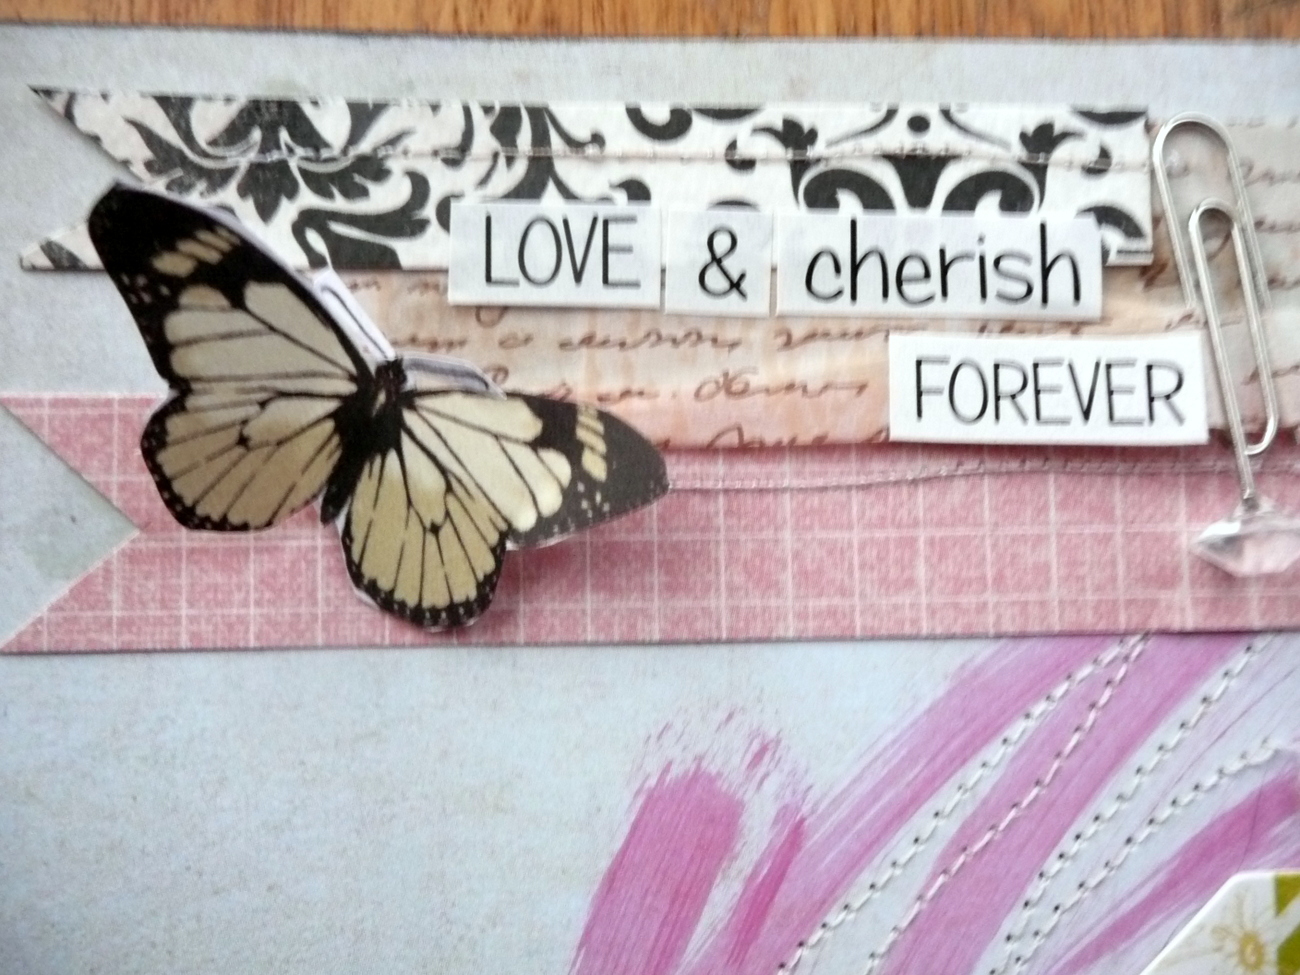
I am into making banners at the moment , but as I had used traditional ones on the last LO,  I decided to make these ones horizontal and added the GORGEOUS and too cute Tim Holtz idea-ology Gem Clips !!!
 
More horizontal banners - sewed across them to add texture and to keep with the shabby chic theme of the LO. 
 
 
Loved my Kit from Veronica- pink paint, gems, flowers +++ and gorgeous papers - heaven for this scrapper !!!
 
Sharon :)

Monday, August 26, 2013

May - A Year in Time.

Is it wrong that we treat our children differently because of gender? Growing up my boys would often ride their BMX bikes around the streets when younger, making jumps in the dirt in the bush or paddocks however I would never dream of letting my girls do this! Well finally my princess is a Teenager! and now expects to be allowed to go places on her own with friends! It's really hard letting her grow up and growing up she is, into a beautiful caring sensitive young lady who we are very very proud of!

Onto scrapbooking! We all have one of 'those months' and May just happens to be ours. So much happens right through the entire month, we have birthdays galore in the family - 3 of my children are May babies sharing the month with my wonderful Mum, sister in law, brother in law, nieces and nephews, we also have aniversaries, our wedding anniversary among them and my hubby always spoils me with the most amazing floral bouquets but I wanted to share a special birthday in my  A Year in Time album, my beautiful girl turning thirteen and unless she is taking 'selfies' with her friends its very hard to get a photo of her!

So I would like to share with you all my May page of A Year in Time! If you like the look and feel of texture on your projects you cant go past texture paste and stencils. I love them! So easy to use and the effects are awesome!


1.  Using G45 May foundation A Place In Time page I cut and distressed all four edges and adhered it to a piece of contrasting purple/lilac bazzill.

2. I love these Creative Workshop templates! Using mini confetti and texture paste I applied randomly to my page as the first layer. Highlighing by gently rubbing with distress ink Milled Lavender.

3.  Taking a beautiful Ornate chipboard frame and clock I applied a generous coat of gesso to both and then lightly sanded to give a shabby look, then applied distress inks milled lavender and dusty concord before lightly spraying with TA pop rocks glimmer mist and I used Glamour Dust ice crystal glaze (ultra fine glitter paint) on the clock face.

3. Using a small chipboard butterfly I first used a Gelly Roll pen Purple Star (I love these pens, so quick to add colour and glitter to chipboard) then placed 3 tiny self adhesive Say it with Pearls, gently folding up the wings to add some diminsion.

4. Building my layers I first used a paper doily coloured again with distress inks in this case Milled Lavender. Using the reverse of G45 May cut-a-parts I cut from the striped pattern paper a piece to look like a banner/bunting flag laying this over a piece of cut lace which was coloured with TA Pop Rocks glimmermist. Place your photo and lay frame over the top.


5. Next I arranged some purple Prima blossoms, a beautiful hand crocheted lavender flower, butterfly, purple button with bakers twine and placed a Prima Shabby Chic birdhouse resin. Using the May cut-a-parts I cut two sentiments of 'Happy Birthday' and scrolled the ends.

6. Placing the clock and small blossom in the top left corner with scrap dots to lift it slightly and finishing with washi tape of two little birds on a branch under torn edge. Place some lavender pearls in the swirls and you are done.

I think you get the idea my beautiful girl likes the colour purple! even her hair has purple dip dyed tips!

Thanks for stopping by and remember to pop on over to the Wild About Scrap store and grab some wonderful products.

Call back soon to see more of our latest creations as we catch up on the Month of June!

Sue xx

Tuesday, July 23, 2013

A Year In Time - May 2012

 
Of course the month of May is associated with Mothers' Day.  Even though there are family birthdays in May, including my husband Craig's, I decided that a photo of my mum and I would go well with the colours of the may pages.
Here is what I did to create this page
  1. Mounted the photo onto the back of the March( because the colours matched) cut apart page from the Graphic 45  Place In Time 8x8 pad  and distressed the edges.  
  2. I adhered a doily to the base page.I used two pieces of card from the Core'dinations 6x6 Vintage Collection pad   and embossed them using a dots and text embossing folder.  I sanded he dots one for a more distressed and prominent look. I inked the text embossing to make it stand out more . These were adhered onto the base page and the mounted photo went on top.
  3. I punched some flowers from the Core'dinations card and front he papers in mauve/cream colours and layered the mauve card ones to make roses. I added a small rose to the centre of the patterned paper ones and added these , along with postage stamps from the May cut apart page , some punched leaves.

  4. I added some Want To Scrap Pearls - Lavender  around the flower cluster and on the flourishes in the top left and bottom right hand corners.
  5. I chose a matching label sticker from the Graphic Place In Time Stickers sheet and added it to the top right hand corner along with the year using the numbers from the Graphic Place In Time Alphabet Stickers sheet
  6. Using a word from the Alphabet sticker sheet and letters =I formed the title and placed it under the photo.
OTHER ITEMS USED - FROM MY STASH

 
doily
brown ink
flower punch
embossing folders
fern leaf punch
small roses
  
Hope this has inspired you to create a Year in review album , if you haven't already got one started.
I am off to post the June page now .. then I will be up to date !! 
I will post a little tutorial on how to make the punched roses on this page in the near future as they are super easy to make :)
Stay tuned .....
Sharon xoxo


Wednesday, July 10, 2013

Trinket Box

Looking around my scrap area I seem to be accumulating a small mountain of leftovers, many from the wonderfully kits supplied by the generous Veronica from Wild About Scrap so I am on a mission to use up these bits and pieces in this ever growing scrap pile and what better way than to create a tiny little Trinket Box. These can be used as gifts but I love this one so much I think I might add it to the shelve and store some little charms in!


Taking some of the flowers, twine, pearls and charms in my scrap pile.

Using left over DS paper off cut, some lace and a small box from the shop.


Cover the box with paper, sand and ink edges to give the aged vintage look and apply lace around the edge either by using glue or some other adhesive.


Arrange small blossoms, twine, gauze, pearls, buttons and charms.


Sweet little Trinket Box fit for a little Princess to keep her treasures in :)
and quick to make!

Thanks for stopping by and pop back soon as I am sure more projects are coming :)

Sue xx