Tuesday, December 10, 2013

A Year In Time - June

 
In June 2012 we adopted Lucy and she is a real honey of a cat.  So naturally I chose her cute photo to be the centre piece for my June page!


Other Stash items used
  • cream and gold ribbon
  • ribbon slot punch
  • border punch
  • flowers
  • gold trinket
  • black letters
  • black pearls
 
Hard to believe we are more than half way through the year and half way through our A Year In time album .... 6 pages to go .. having such fun !!!
 
Sharon xx


Saturday, December 7, 2013

Paper Mache - Star Ornaments

I've been busy the last  few days making these cute little star ornaments from Darice.  They're something that I put aside from last Christmas to make this year.  I seriously thought these would be extremely fiddly and difficult to decorate, but they couldn't be easier!  You can make them as simply or elaborately as you like and they will still look great on the tree.... :) 

I made mine in 4 different styles, but using the same paper collection.  I did this as I was keen to try out different techniques.  However for a consistent look for your tree you'd be best to select a "look"  that you want and stick with it.  However I love all of mine!
 
 
Materials used:
  • Darice Paper Mache Star Ornaments - 2x2" and 2x3" (total of 4 Stars)
  • Fancy Pants - Home For Christmas 6"x6" Paper Pad
  • Craft Glue - general purpose craft glue
  • Tim Holtz idea-Ology - Paper String
  • Glimmer Mist - Pearl
  • Glimmer Glam - Tinsel Town
  • Clearsnap - Fairy Dusty - Pralines & Cream
  • Tsukineko Glue Pad
  • Clearsnap Top Boss Embossing Powder -  Verdigris
  • Ranger Embossing Pad
  • Want 2 Scrap - Rhinestones Clear
  • Ribbon strips
  • Bells
  • Ranger Adirondack Paint Dabbers - Lettuce & Espresso (optional)
Step 1 (optional) - I painted the stars - front and back - with Adirondack Paint Dabbers - I wasn't sure when I began whether I was going to cover the entire ornament with paper or if maybe some parts would still be visible.  They did look good painted so could be left that way.

Step 2 - cover with pattern paper.  This was done one side of the star at a time, leaving time for the glue to dry between sides.  First paint the star with a general purpose craft glue....I have used a bit too much in the picture below. :) 
Place the star on the paper so that the point  in the centre is the only part touching the paper.  Keep star balanced with one hand and with the other, gently, but firmly, smooth the paper onto the star.  Starting from centre point and moving to the outside edges, run your finger along the ridge and in the groves smoothing the paper and any wrinkles.  You will need to hold the star and keep smoothing until it adheres to the ornament.
To help keep the shape while the glue dries and help stop the paper from lifting off, squeeze the corners of the each of the points making creases - you can see the creases running through the paper in the photo above.
Once dried completely, trim as close as possible to the ornament and repeat for the other side.  Sanding of the edges may also be necessary.

Step 3 - Before gluing the second side of paper, I also added loops of ribbon in place of the gold string which I personally don't like the look of.  I made the loops much longer than the originals as I find the strings are never long enough when attaching to the tree!

Step 4 - I  wasn't happy with the naked look of the edges.  To fix this I used paper string glued to the edges.  Other ideas could be Washi Tape run around the edges or narrow ribbon. 

  
The paper string was surprisingly easy to adhere.  I first painted the edges of the Star with craft glue and then starting at the midpoint of the bottom of the star, I ran the paper string along the edge, pressing firmly into place as I went. 

Step 5 - Now comes the fun part of decorating the star!  Seriously though, the stars are now ready to hang and you could leave them as is....but if you want to have some fun keep reading...

 
Star 1 - sprayed with Glimmer Mist Pearl and decorated with clear rhinestones.  Two bells were tied together paper string and glued to the centre as a finishing touch.
 
Star 2 - Using the Tsukineko  Glue Pad Refill I let the glue run down from centre of the star and ridges and then sprinkled Fairy Dusty over the top....be a bit careful as Fairy Dust is very fine glitter and gets everywhere including your eyes.  To finish off a piece of paper string was tied diagonally across and a bell attached.  The ends of the paper string were curled around the end of a paintbrush to give the curls.

Star 3 - I ran the embossing pad along the ridges of the star pressing lightly.  Then sprinkled with the Verdigris embossing powder and set with my heat gun.  Another strip of paper string, ends curled, and a bell finish this star.


Star 4 - was painted  with Glimmer Glam Tinsel Town.  I tried for a roughly painted look, but the Glimmer Glam ran down the star too well and I ended up with fairly even coverage.  I really liked the look of this star without ornament so only added a simple bell to the hanger.

The back sides of all the stars were painted with Glimmer Mist Pearl to give a nice sheen!

I hope I've given you some inspiration for making your own ornaments.  These really couldn't have been easier to make and so much nicer than buying from the store!  Wouldn't it be nice to make one for every member of your family?  Maybe add the initial of their name or a small photo????


Happy creating everyone!
Veronica
xx

Monday, December 2, 2013

Dusty Attic - Advent Calendar


Wow, what an amazing product to work with!!  I have used Dusty Attic's Chipboards before but had never used any of their other products such as the Advent Calendar.  Everything slotted perfectly into place which made gluing it together so easy - loved it!


Saturday, November 30, 2013

Graphic 45 - Gift Tag

Being invited friends to the 12th birthday celebrations of their daughter, I thought it was the perfect opportunity to show the Italians what papercrafting is all about....or at least a part of what it's about.  So, I whipped up this tag...quite literally it took me about 30 minutes, but the ballerina was a leftover from a previous project so that saved me a little time.
 
 
Materials used:
 
  • Graphic 45 - French Country - Tags & Pockets;
  • Graphic 45 - French Country - Banners:
  • Graphic 45 - French Country - Flowers;
  • Graphic 45 - Nutcracker Sweet - Ballerina cut from the Snowflake Waltz paper;
  • Graphic 45 - A Place in  Time - Alpha Stickers - "Happy Birthday"  sticker;
  • Want 2 Scrap - Silver Rhinestones;
  • Tim Holtz - idea-Ology - Paper String;
  • Tim Holtz - idea-Ology - Label Letters;
  • Glossy Accents;
  • Glimmer Mist - Silver Sugar

 
Steps by Step:
  1. I selected which tag I wanted to use as my base from Graphic 45 French Country Tags & Pockets;
  2. Ballerina - maybe out of place, maybe not - Safè does ballet so I wanted to add ballet to the theme.  The Ballerina was cut from the sheet of cardstock and to give a nice 3D finished it was coated with Glossy Accents;
  3. The flower custer was made by first selecting 3 different sized, but colour co-ordinated flowers from the Graphic 45 French Country die-cut Flowers. I scrunched each of the flowers as tightly as possible to give more dimension and a bit of a grungy look.  I used double-sided tape to stick together and then sprayed with Glimmer Mist Silver Sugar to give a bit of sparkle. 
  4. The flowers were then layered along with the Banner and Sunflower. Rhinestones made the perfect centre for my flowers adding a bit of glammer and bling to the tag.
  5. To finish the bottom section, the Happy Birthday sticker was added.  Note that the sticker hangs over the edge and of course is still sticky on the exposed sections.  I cut out small pieces of matching scrap cardstock and stuck these to the back of the overhanging pieces.
  6. The Banner across the top was made by selecting 3 of the smaller banners from the Graphic 45 die-cut Banners. To assemble with the Paper String couldn't be simpler...I wanted some dimension so used American Craft This To That Foam Dots to raise the banners, but first laid the Paper String across the tag as I wanted it and adhered each Banner over the top of the String - killing 2 birds with one stone....or rather, adhering 2 items with one foam dot! :)
  7. The ballerina was also adhered using the Foam Dots to give some more dimension.
  8. The final touch was to add our names and a piece of ribbon to tie to the parcel.  Our names were made from the Tim Holtz Label Letters....I will admit that adding "Veronica" after everything else was stuck down was a bit of a challenge and I made a mistake not doing it first.  I ended up doing it twice as it was awkward trying to line up the letters only to find  after the first time it was really wonky!  But that's what makes scrapping so great...for every error you find a new technique or a unique piece of art... :)
 
Really this couldn't have been easier to make and I'm definitely going to be making more in the future.  To add a nice hand-made tag to the present was nicer for me to give than the gift itself.

As a review - I was amazed out how easy to use and how nice the finished look was using these Graphic 45 Die-Cut shapes!  Being perfectly matched colour-wise was a big advantage of course.  I've never been a big fan of using die-cut shapes.  Often I find they're not the same quality cardstock as papers or too glossy and so I have usually given them a miss...however with the Graphic 45 range this was not an issue and I will definitely be adding them to my "must have" list for all future orders. :)

I hope I've given you some inspiration...maybe use the same ideas for quick to whip up Christmas Tags?

Until next time!
Veronica

Wednesday, November 20, 2013

Dream

Today I want to share a quick card, simple design but elegant. It's always nice to receive a special handmade card, just makes the occasion that little bit more special! So if the thought of creating a handmade greeting card becomes a little daunting try using a basic card layout design, lots available. It really isn't as difficult as it might seem. Using different patterned paper or embossing folders and changing the embellishments can change the focus of a card allowing you to use the same simple sketch design over and over :)


  • First step is to cut cardstock to the size you want. Mine is cut to 6x4 1/2 (folded)
  • Then I cut a piece of coredinations pastel a little smaller and ran it through my bigshot to emboss. 
  • Using my tool I lightly rubbed and sanded to help enhance the ebossing design. Lightly swiping with ink or chalk can also help 'pop' the embossing design.
  • I then took some ribbon from my stash and adhered it across the bottom
  • Then I placed a smaller blossom in the right hand corner and used a rubon on word. Voila!
Maybe this has inspired you to get a jump start on your Christmas card list :)

Have a great day, I am off to enjoy some of this lovely sunshine while it lasts!

Thanks for stopping by!

Sue xx

Monday, September 9, 2013

Friend

What is Scrapbooking? lol don't laugh, seems a lot of people don't know, hard to believe as Scrapbooking has been a favourite past time of many for years! I get asked a lot lately what is it you actually do with your photos! Scrapbooking is preserving your personal and family photos in a book, adding memorabilia, embellishments and journalling. Some people include stories or scrap by theme, like holidays, special events, family firsts etc. It's quite simple really, it is about getting your photos out of drawers and boxes and into albums for all to see.  Now I really should start putting my pages into albums :)

I have lots of photos of my little princess and her Shetland pony but I think this one is adorable! They have a special bond and spend a lot of time just casually walking around, Shawnee grazing while my girl chats away! It's like they understand each other.

Using the gorgeous range from FabScraps, which is just beautiful with its fun designs which arrived in my latest kit from Wild About Scrap, the best online Scrapbooking store! I hope you are inspired by my layout.


Project Products Used:

FabScraps - Little Peeps - Sweet Pea
Coredinations - Pastels Cardstock
MS Punch border - Vintage Floral
Petaloo - Mixed Textured Blossoms
Petaloo - Mini Pearl Daisies
Green Tara - Blossoms
Tattered Angles Glimmer Glam - Grand Tetons
Donna Salazar Chox - Sparrow & Petals
Dusty Attic - Picket Fence
Girls Paperie - Pennant Pins
Hessian

Instructions:

1. Using Fabscraps Sweetpea cut a small strip from two sides, just enough to allow the bazill cardstock to form a border or frame. Distress all four edges and then lightly ink with Donna Salazar Mix'd Media INX Chox, I used Petals.
2. Take a 6x6 piece of Coredinations Pastel cardstock and emboss and punch one side with MS Vintage Floral, sand gently using a distressing tool. Wash with a light coat of TA Glimmer Glam, lightly ink edges and mount your photo.


3. Arrange a floral cluster with your flower blossoms and other embellishments, add some twine. I added some hessian to give some texture.
4. Paint your chipboard with a good gesso coating before inking with DS Chox. I allowed some of the gesso to show through on the fence to add an age worn look.


5. Add a small cluster of flower blossoms and embellies to top corner. I used a chipboard heart, blossoms  and vintage key charm.
6. Place chipboard letters over an old dictionary torn paper page using a little piece of hessian for more texture.
7. Complete and now ready for a frame or album :)

TIP:  I like to first lay everything out and when I am happy with the placement of everything I will start to glue it all together, taking a photo so you can refer to it also helps!

Thanks for stopping by!

Sue xx

Wednesday, September 4, 2013

Our Lucy Liu

Thank goodness for holidays as it has given me a chance to create and catch up on all my DT projects. Here is my second LO produced with the wonderful items in my DT Kit .
 
 
Products used from Wild About Scrap Online Store


Stash Items Used
 
  • sequins
  • butterflies
  • sewing machine and thread
  • black ink
  • doilies
  • chip letters
  • word stickers
 
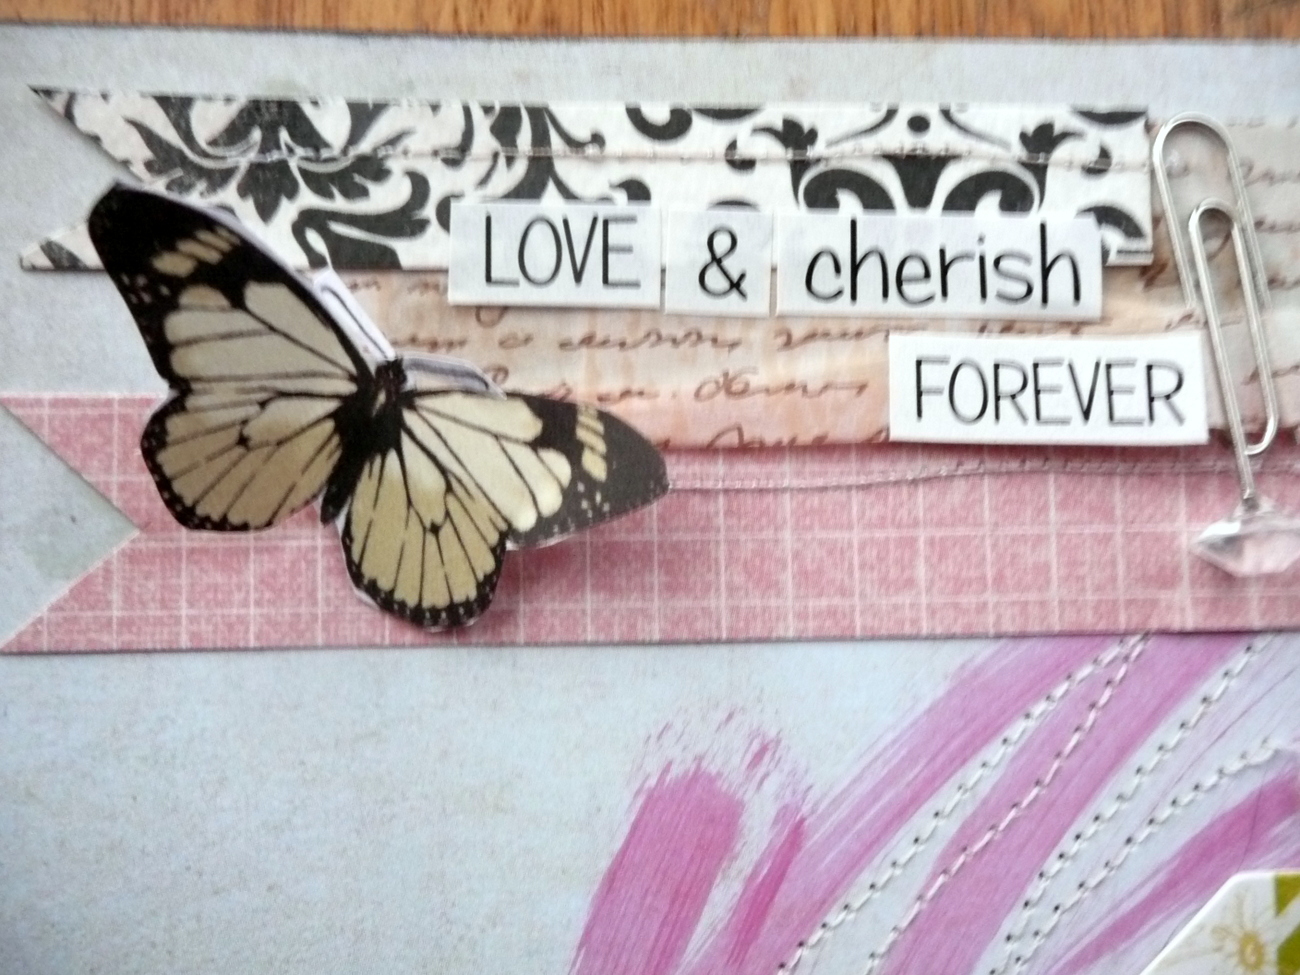
Loved, loved, loved using the Distress Paint it is so easy to use in a bottle with a dauber applicator.  Here you can see how I used it to create the circular paint smears on the LO - such fun to 'play around' and you cant get it wrong as you can build up the colour as you wish !!
I stitched randomly over the paint to ad texture and detail - then added the little crystal coloured sequins.

I am into making banners at the moment , but as I had used traditional ones on the last LO,  I decided to make these ones horizontal and added the GORGEOUS and too cute Tim Holtz idea-ology Gem Clips !!!
 
More horizontal banners - sewed across them to add texture and to keep with the shabby chic theme of the LO. 
 
 
Loved my Kit from Veronica- pink paint, gems, flowers +++ and gorgeous papers - heaven for this scrapper !!!
 
Sharon :)