Sunday, February 22, 2015

Basic Grey - Herbs and Honey - Friends Mini Album


Hello,

Where would we be without our friends? Do you have someone special you would like to create a mini album for?

Basic Grey - Herbs and Honey range has a really versatile range of embellishments included in the Element Stickers, Title Stickers, Die Cuts and Transparencies and the 12x12 sheet named Artichoke.

My project for today is a mini Album celebrating 'Friends'.


Gather all your supplies - I sorted through the Stickers and Die cuts etc and selected all the 'friend' related embellishments.


The papers I selected were:  Peas, Asparagus, Onion and Corn.

Cut the papers and covers to your required size, then cover the covers with co-ordinating paper.  I designed and embellished my front cover next, using some of the embellishments and Tim Holtz Alterations Bigz Die - Garden Greens.  The wording is cut using Tim Holtz Alterations - Wanted Alphabet and then covered with glossy accents. I added Distress Stickles - Mustard Seed to the leaves.

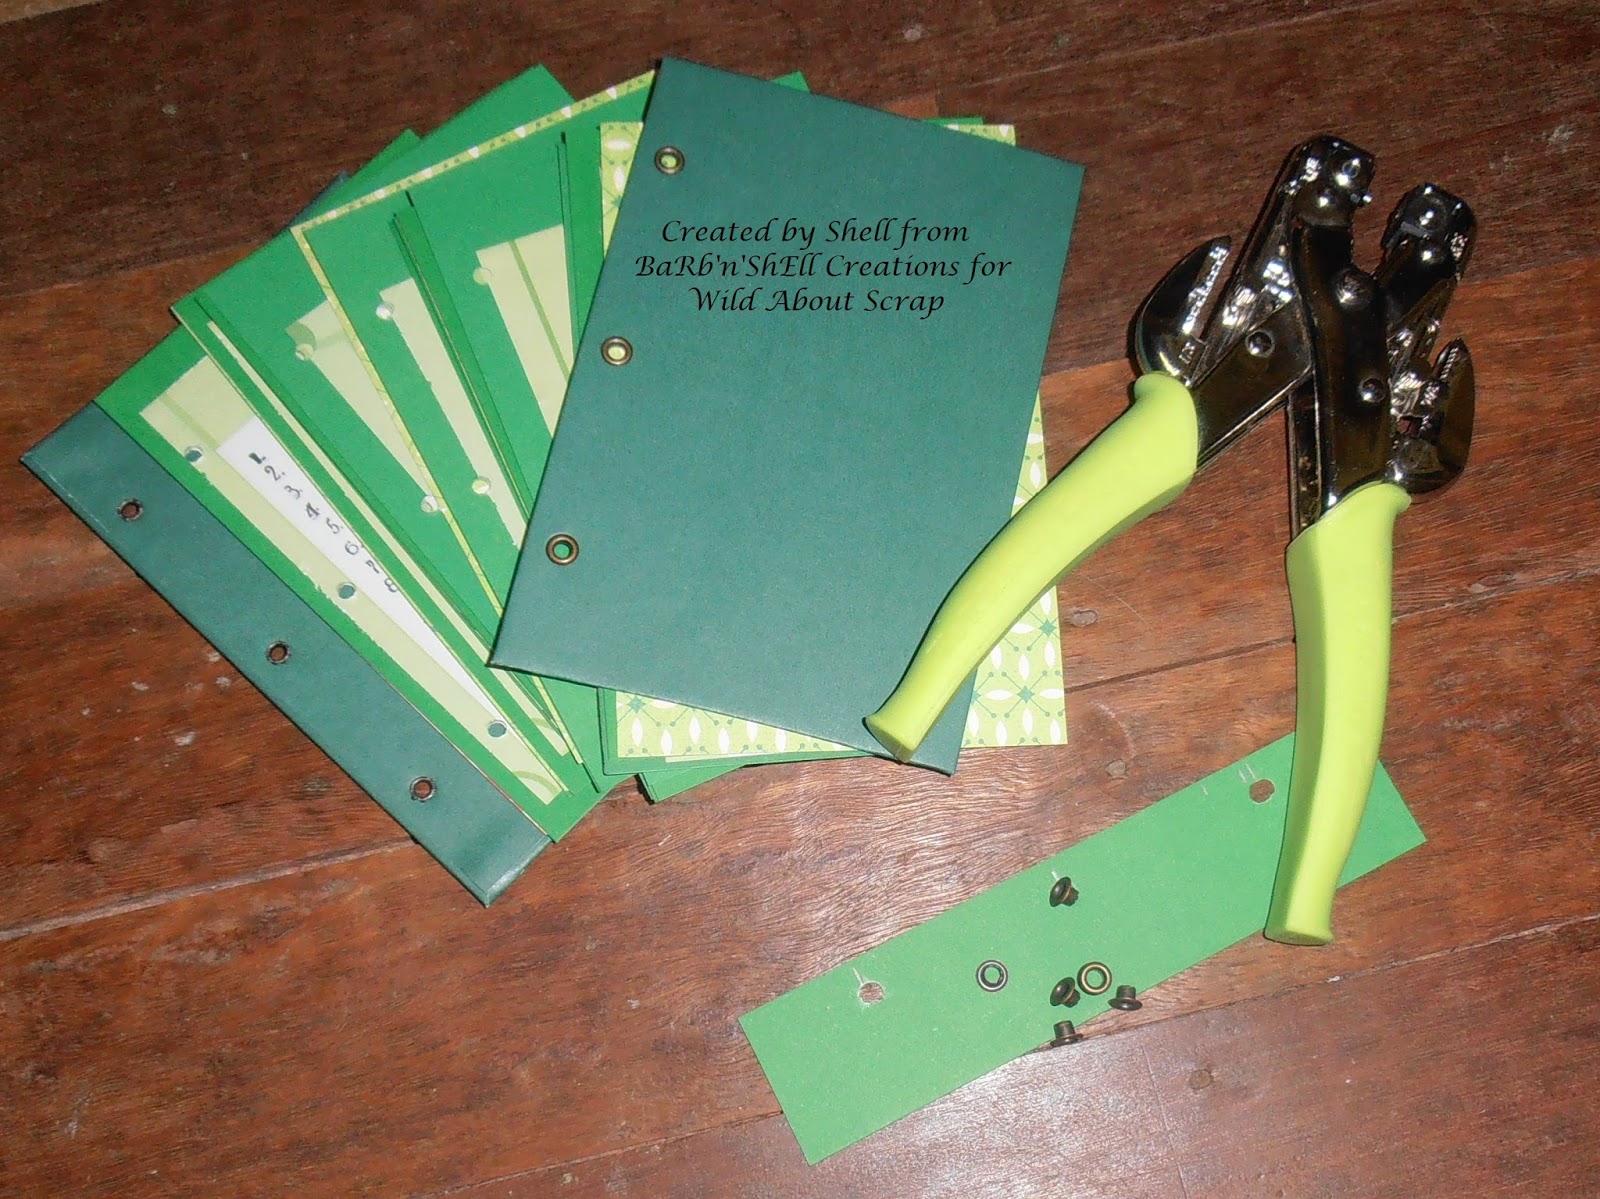
Next, place your pages in order and bind using your Zutter.  The next step is to decorate/embellish your pages.   I have kept the pages really simple with the idea in mind of adding a photograph to every page.  When I adhered the larger rectangular shaped embellishments - I adhered them by only three sides - to be able to place corners of photographs underneath if required. I rounded the top corners of the pages using my WRMK Corner Chomper and then highlighted this by 'stitching' with a black marker - just a bit of added detail.


Lastly, add any ribbons, rhinestones and any other final touches you would like, and


Friends, you and me - we make the 'pearfect pear'.

Products used to create the Friends Album are:


  • Basic Grey - Herbs and Honey - Peas, Asparagus, Onion, Corn and Artichoke 12x12 papers
  • Basic Grey - Herbs and Honey - Element Stickers
  • Basic Grey - Herbs and Honey - Die Cut Transparencies
  • Basic Grey - Herbs and Honey - Title Stickers
  • Tim Holtz - Alterations Bigz Die - Garden Greens
  • Tim Holtz - Alterations - Wanted Alphabet Die
  • Glossy Accents
  • Distress Stickles - Mustard Seed
  • 12x12 co-ordinating paper to cover album
  • Black card for lettering on cover
  • Ribbon, rhinestones, clear gel pen
  • Zutter and o'wire
  • WRMK Corner Chomper

See you again soon friend,
Shell
xox


Carta Bella - Christmas Time - Surprise Box...


Hello,

Surprise!!   Today I have a Surprise Box to share with you.  These boxes are a fantastic gift idea - you can add photos to the inside (and the outside if you wish!) before you gift them or the recipient can add their photos after...


Gorgeous isn't it? It looks just like a present... keep reading and you will see the surprise inside!

I have chosen paper from the Carta Bella Christmas Time range, this particular one is named Red Ornaments which I have teamed up with Green Cardstock and Brushed Silver card.


First step is to cut your box base and lid. Then cut 9 pieces of the brushed silver and the paper to size. (5 for the outside and lid, and 4 for the inside).


Adhere your pieces into position, adding ribbon, brads and rhinestones where desired.  Now, for the inside surprise...  I created 3 little presents for the inside of my surprise box, using the same card, silver card and paper as the base.
Cute, huh!


 Underneath the presents, I used a piece of the brushed silver card and added a punched paper corner in each corner, highlighted with rhinestones.


Lastly, the lid...


I continued the ribbon up over the sides of the lid and created a large bow to sit on the top.
Using red and silver embossing powder, I heat embossed 2 ornaments and attached these on top with a finer silver and red ribbon.  I also added a tiny tag featuring the word 'merry' embossed in red.

 Another view of the inside, including the lid.


Products used:


  • Carta Bella Christmas Time - Red Ornaments paper
  • Stampin' Up Green and Brushed Silver Card
  • Ribbon, brads, rhinestones
  • Red, silver embossing powder
  • Hero Arts Decorative Ornament stamp
  • EK Success corner punch
  • Stampin' Up Pennant Parade stamp
  • Stampin' Up Tag Punch
Please leave a comment letting me know what you think of my surprise box!
Until next time
Shell
xox


Basic Grey - Herbs and Honey - Gardeners Diary


Hi,

Bloom where you are planted, plant kindness and gather love, growing like a weed, the cream of the crop.... These are some of the verses from the embellishments from the gorgeous Basic Grey - Herbs and Honey range.  So, how could I not be inspired to create a Gardeners Diary after seeing these?!?


I must warn you - I don't have a green thumb - every plant I touch generally dies - but I have found out... you actually need to water plants to make them grow! Haha - who would have thought it??

Now onto the Diary - choose your papers first:  Basic Grey - Herbs and Honey - Peas, Asparagus, Onion, Corn and Artichoke.


Then, sort through the embellishments in the range - Element Stickers, Dies and Transparencies and Title Stickers as well as from the Artichoke 12x12 and decide which you would like to use.


I then 'planned' my diary - decided what I would like to include:
A calendar, moon phases charts, a garden design layout and irrigation layout, a rainfall chart, a list of purchased plants, a record of what was planted on which date, places to add photos...


I handstamped the calendar making sure I stamped the right number of days for each month... 30 days have September....
I created word documents for the other features (except for the moon phases - cut and paste that one from Google - thanks Google!), stamped and printed all of these on some patterned copy paper which I was given from somewhere - it's amazing what you find in your stash sometimes! Cut these to size and mounted them on green cardstock.


Next, I cut my Basic Grey - Herbs and Honey pages to size, created a cover and covered this with green paper. I then bound these using my Crop-a-dile to punch three holes for rings. I added eyelets to the holes in the covers for added stability.

Now, backtrack a bit - when I was planning my Diary, I originally thought I would create tabbed sections for each month, but as I went along I decided to do it differently... So, now in the front section (each section is divided by the Herbs and Honey papers) I placed the information feature pages eg. garden design layout etc, then, in every other divided section I have placed 2 months i.e. January and February and a moon phase chart for each month. I also decided to bind the book with rings in case the Diary owner would like to change the order of the pages, add more pages, add more photo opportunities etc etc.


Did you have a close look at the above photo (Right hand top) at the Garden layout photo - I used a sheet of acetate for the irrigation layout over the top - so you can see where the plants are and design your irrigation over the top... Clever Huh?!?


There are plenty of photo opportunities in the diary - every divider (except the inside front cover) has space to add photos on the front of the dividers and I have left the back blank to add your beautiful garden photos or photos of other gardens you are inspired by.
I rounded the corners of each paper section to make it easier to find the next section using my Corner Chomper.


Design your embellishments for the front and back covers - I have kept mine fairly simple.

Products used to create the Gardeners Diary:


  • Basic Grey - Herbs and Honey - Peas, Asparagus, Onion, Corn and Artichoke 12x12 papers
  • Basic Grey - Herbs and Honey - Element Stickers
  • Basic Grey - Herbs and Honey - Die Cuts and Transparencies
  • Basic Grey - Herbs and Honey - Title Stickers
  • Tim Holtz Alterations - Frameworks Honeycomb Die
  • Tim Holtz Alterations - Typeset Lettering Die
  • Glossy Accents
  • Thick card for the covers
  • Green cardstock for the pages and green paper for the covers
  • Camel coloured cardstock for the lettering and the honeycomb die
  • Green copy paper for printing feature pages
  • Rings and eyelets for binding
  • Ribbons, rhinestones
  • WRMK Crop-a-dile and Corner Chomper
  • Darkroom Door Essentials 1 Collection - Calendar
  • Black ink for stamping
  • Computer and printer to create feature pages

I would like to say I was off to do a spot of gardening, but now my thumbs really are black -  from stamping!!!

Bloom where you are planted!
Shell
xox