Showing posts with label Ranger. Show all posts

Friday, November 14, 2014

Worn Christmas Cover

It's November, and you know what that means.. the Countdown to Christmas is on.
Christmas is my very favourite time of the year. There is just something truly magical about Christmas.  Even though for me,  Christmas is normally spent at the beach, I would one day love to have a cold Christmas, or even better a White Christmas. Until then I will just have to make do with the gorgeous Christmas lines that are available..
 
Today I've got just the outside of my Christmas Journal to share with you. I am actually organised this year and have it finished before December.! ( well the cover anyway!) There are so many options and choices of gorgeous Christmas lines out right now.. Í have of course gone with Vintage Christmas and some gorgeous Tim Holtz lines..

Wednesday, November 5, 2014

Prima Epiphany Collection..

Hi Guys.. Karen here with you again today.. I have to say I fell in love instantly with the new Prima Epiphany Collection.. it's a gorgeous collection full of girly grungy vintage goodness!
 
Some of the papers are just stunning.. so I chose a couple to make a very quick mixed media tag.. I teamed it with some sequins from the Prima  Epiphany Ephemera pack, a bit of Tim Holtz jute string , Remnant Rubs and some glass glitter, beads and matte gel.
 

Wednesday, August 27, 2014

Fancy Pants - Be Different - Door Sign


Hi all!

Sue here today sharing something a little "different" I created recently using the 'Fancy Pants - Be Different' range. This creation was inspired by the July challenge at Off the Rails Scrapbooking challenge blog. It's not often I go "off the page", but the gorgeous little monsters on the 'Be Different - Monsters' paper were just BEGGING to be fussy cut, so I decided to create a sign for my twin boys' bedroom door.

{Believe it or not, this sign was actually created from the side of an old cardboard box!}

Here's how I created the background...


My "custom mist" was created using several drops of Donna Salazar Mix'd Media Inx Refill (mine was Verdigris), combined with water in a Ranger Inkssentials Mini Mister. (I love that I can create my own mists like this!)

Once the background was dry, it was simply a case of embellishing it. The words were all cut from the 'Be Different - Oh Boy' paper, whilst the monster characters were cut from the 'Be Different - Monsters' paper. There are also a couple of pieces from the 'Be Different - Ephemera Pack'. (I loooove this pack of embellishments, there are so many cool ones!) I mounted lots of my elements using foam tape to add dimension.


To add to the sense of fun, I also created a couple of little flags from paper offcuts and toothpicks, and used Dusty Attic - Barbed Wire chipboard, which was lightly coloured with Tim Holtz Distress Ink (Festive Berries). The border around the sign was simply washi tape folded over the edges.


I hope I have shown you how fun & easy it can be to create your own decorative items and that you might now be inspired to create your own. If you do, be sure to share it with us on our Facebook page HERE
 
Til next time, happy scrapping!
 
Cheers,
Sue P

Tuesday, August 5, 2014

Distress Spritzer


Hi Everyone - Karen here with you today.
 
I want to share with you a few little things that I have found out while playing with my Tim Holtz Distress Marker Spritzer.
 
Now this thing is some serious fun to play with, but I found a couple of little things that are really important when you are using it.
 
 
The first one is to make sure that you have your marker tip extended a decent distance past the air hole on the spritzer. If it's not far enough you wont see any colour on your project - not matter how much you squeeze the bulb on the end..  I found this out the hard way... 
 
This is how far I extend mine past the tip on the end, sometimes even a little further,


The next thing that is important to know is the difference in the closeness to the paper, and the how gently and the speed which you squeeze the air chamber at the end.
 
The picture below shows you the difference - you get a more spread out speckled effect when you have the marker further away from the paper, and use a gentle and slower pressure when squeezing the  air chamber.
 
Whereas you get a far more concentrated effect when the marker tip is closer to the paper and you squeeze the air chamber faster and with more pressure.


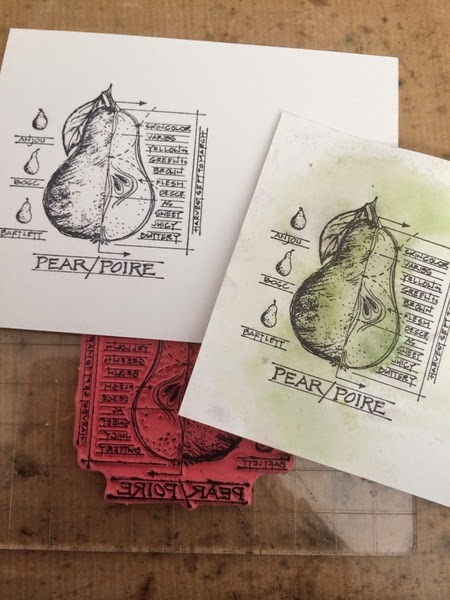
Here I have used several green colours  with a stamped image, after I finished spritzing the markers I sprayed the Distress water colour cardstock  with a light mist of water, this blended the colours really well. I then fussy cut the pear and stuck in onto another piece of distress water colour card ready to use on a project.
 
 
 The colours I used were:


I hope this has given you a little bit more info about the distress marker spritzers. Thanks for stoping by, hope to see you again soon.
 
Karen xx

Thursday, June 12, 2014

Prima Princess & Donna Salazar Inx!


Hi everyone, Sue here today to share a layout I created using the recently released “Princess” collection from Prima Marketing. This collection is based around a beautiful soft colour palette, sweet images, and is just so deliciously gorgeous & feminine.

Here is my layout...


To create this layout I started with a sheet of Prima -Princess 'Ava' for my background. I trimmed it down to 11x11” and distressed the edges. I then swiped some gesso over the area I was planning to place my photo & embellishments and applied some texture paste using a mask. Once dry, I added colour.


To achieve this look, I started by making my own colour mist using the Donna Salazar Mix’d Media Inx - Refill – Adobe and a Ranger Inkssentials Mini Mister. I filled the mister with water, added about 8 drops of the ink and shook to combine. (I was able to use water as a base for my spray as these are pigment inks that are water soluble. How many drops you add will depend on how rich you want the colour.) I then spritzed it onto my background, along with some glimmer mist in a slightly different shade to add depth.


After the colour was dry, I mounted my background sheet on some cardstock, added extra paper layers & some gauze under my photo and then embellished my layout.


The flowers I used included Prima Princess – Fairytale Flowers and Kaisercraft Paper Blooms in Honey, Sage and Olive. (The tiny white flowers were from my own stash.)


I also used some of the Prima Mixed Media Doll Metal Embellishments and chipboard from Dusty Attic. The mini vines were painted with the Donna Salazar Inx, whilst the Love You Arrow was first primed with gesso, then sprayed using the ink spray I made earlier.


If you are a fan of gorgeous & girly then I highly recommend you check out the Prima Marketing Princess Collection, or you could try making your own colour sprays. You will find the Inkssentials Mini Misters in store HERE and a huge range of inks available HERE. (I used the Donna Salazar Mix’d MediaInx Refill, but the Ranger Distress Re-inkers would work well too.)

Until next time, happy scrapping!
Cheers,
Sue P

Saturday, March 29, 2014

A Couple of Girly Layouts!


Hi everyone! I am back today sharing some more creations with you. First up, this one which was created using Bo Bunny’s Head Over Heels range. This collection has a fabulous pink / red / black / white colour palette and is perfect for creating some loved up layouts!

Wednesday, March 26, 2014

Bo Bunny Easel Card


Hello,

After creating the Dusty Attic Tool Caddy using Papers from the Bo Bunny Head Over Heels range, I had some leftover pieces and this is one of the projects I created with the leftovers...